> ## Documentation Index
> Fetch the complete documentation index at: https://www.offlineprotocol.com/docs/llms.txt
> Use this file to discover all available pages before exploring further.
# SDK Setup Guide
> Learn how to set up the Offline Protocol SDK in your application with proper configuration.
Follow these steps to integrate the Offline Protocol SDK into your project and configure it correctly.
## 1. Create a New Project
Before using the SDK, you need to create a project in the developer portal.
### Steps to Create a Project
1. Go to [https://dev.offlineprotocol.com](https://dev.offlineprotocol.com)
2. Sign in to your account
3. Click the **Project Selector** dropdown (beside your team name)
4. Select **Create Project**
5. Fill in the project details:
* **Project Name**: A descriptive name for your application
* **Description**: Brief description of what your project does
6. Click **Create**
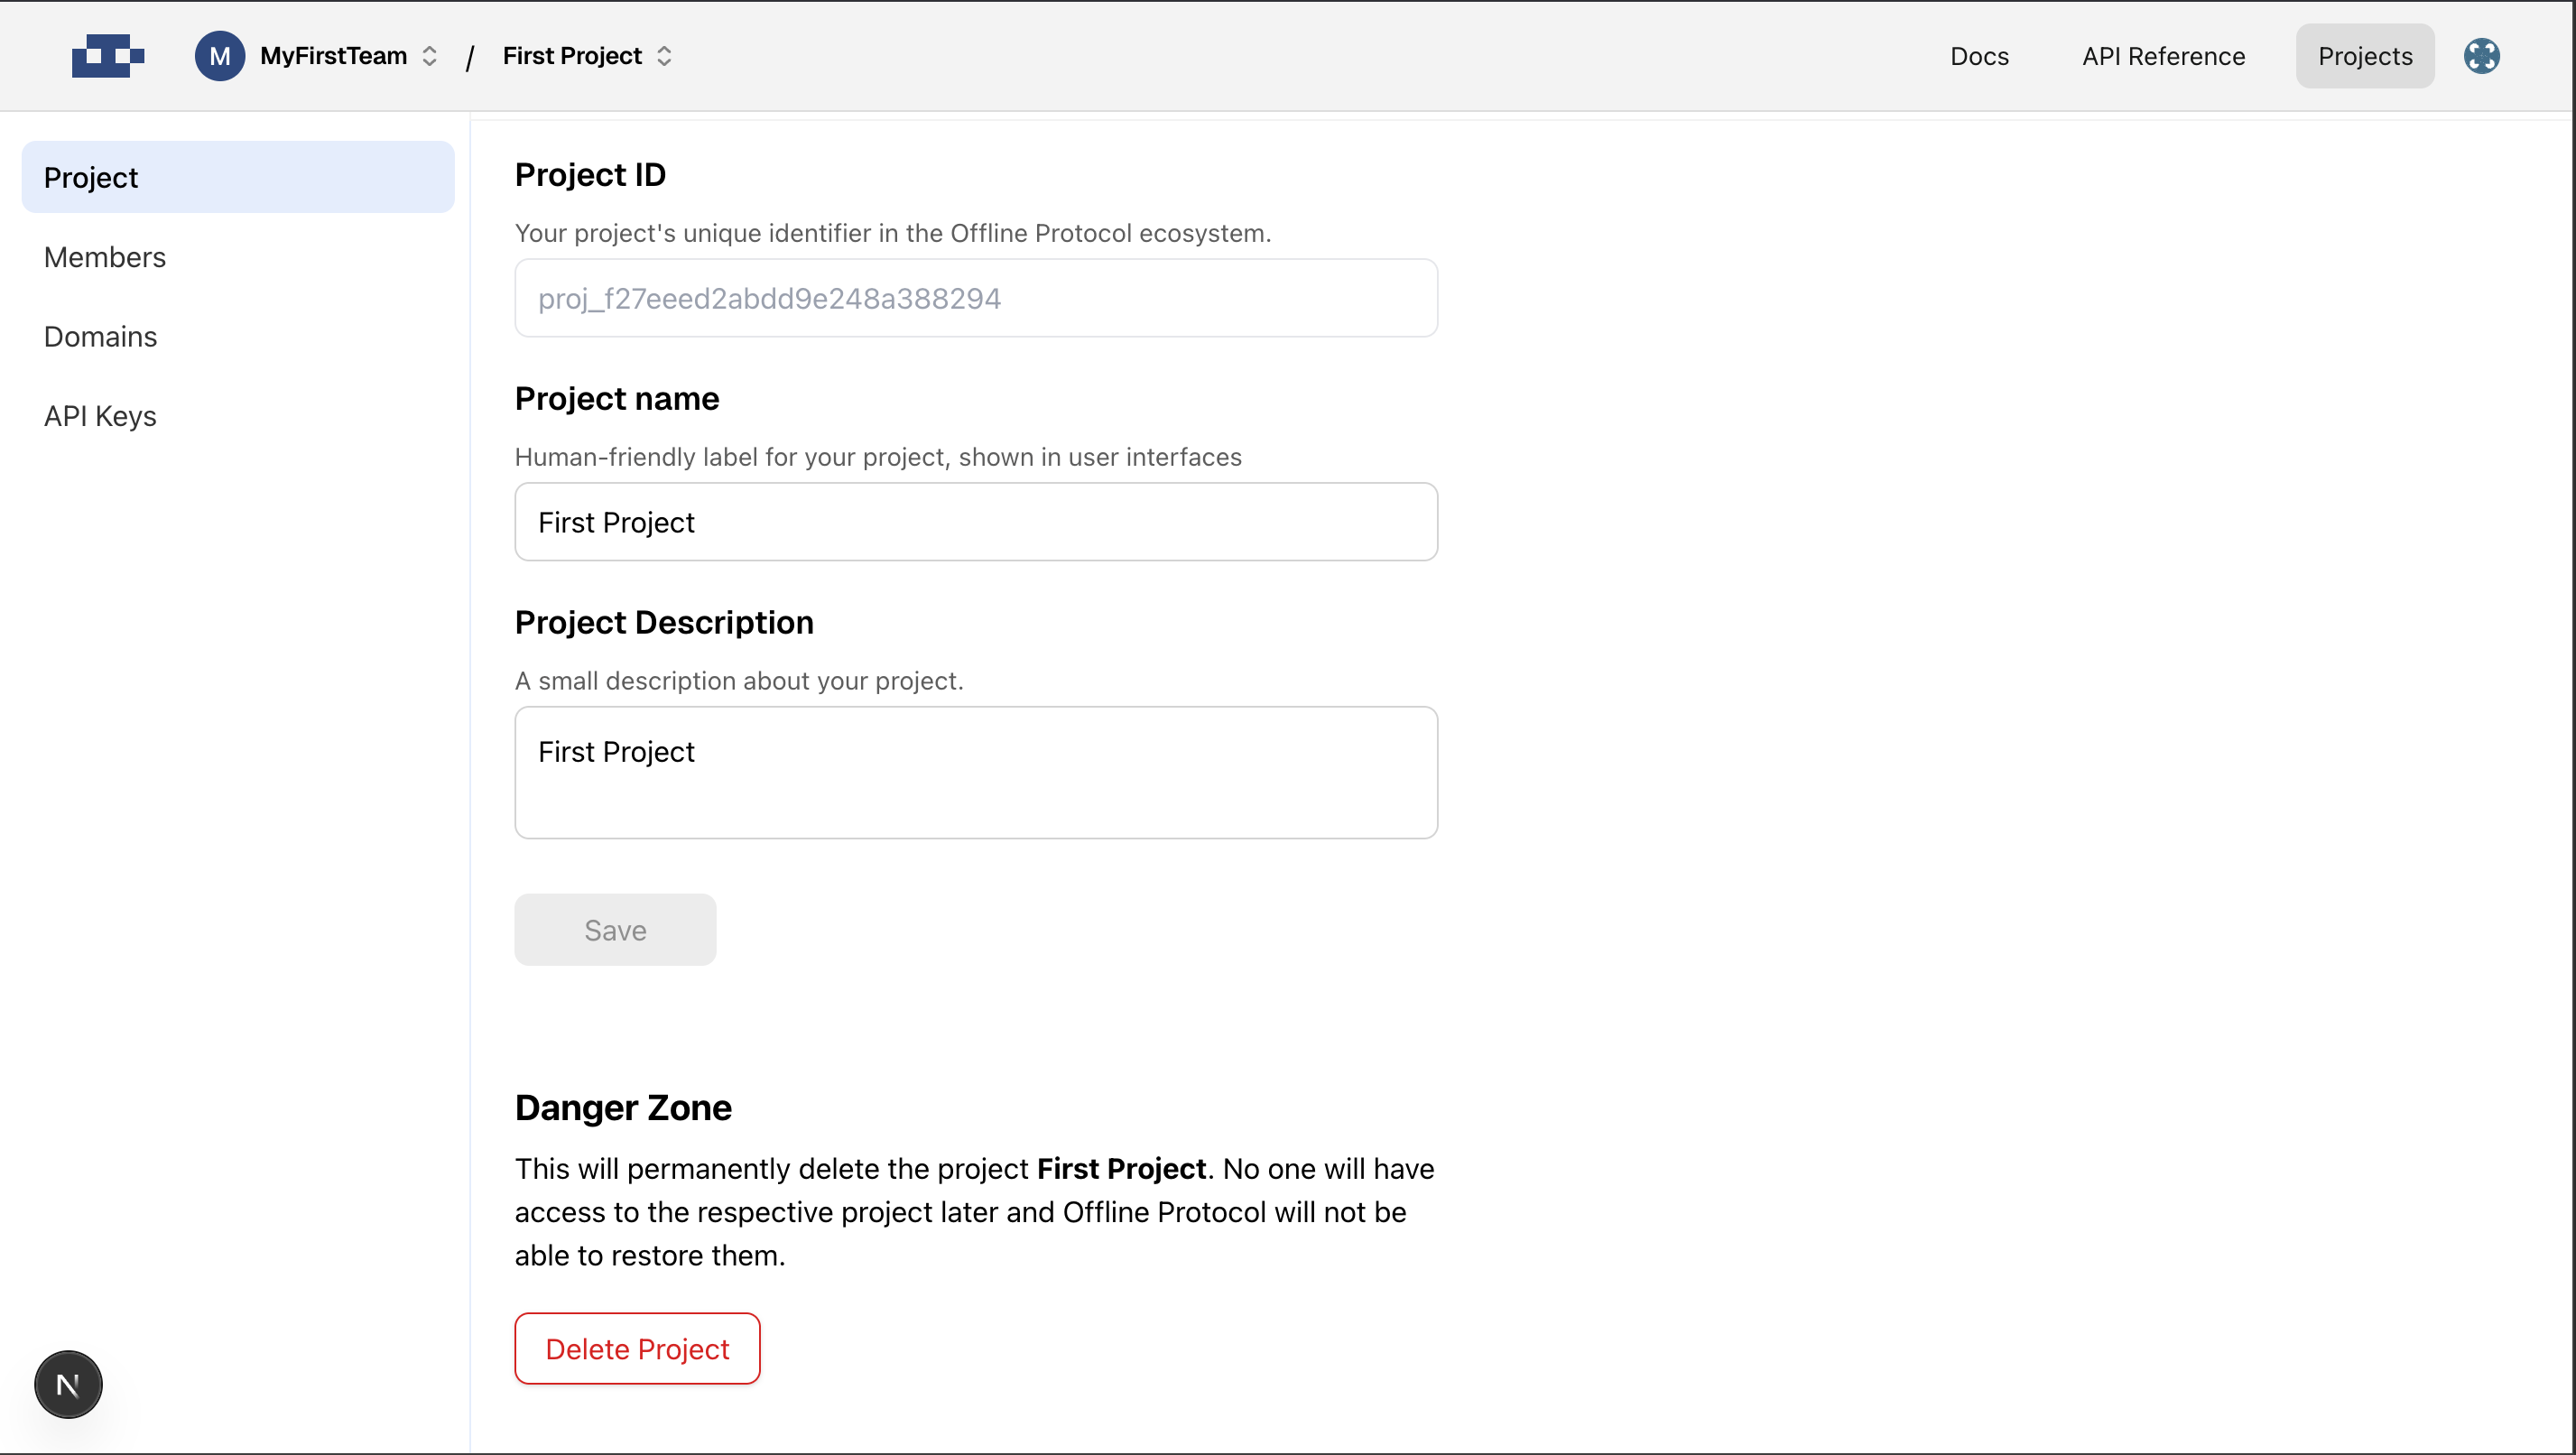
Once created, you'll receive a unique **Project ID**. Keep this handy, you'll need it for SDK initialization.
Meanwhile, you can edit the name and description of the project.
 ## 2. Configure Domain Allowlist (Web Applications)
If you're building a web application, you need to configure allowed origins for security purposes.
### Add Allowed Origins
1. Navigate to the **Domains** tab when on the project dashboard.
2. Click **Add Origin**
3. Enter your domain(s):
* For local development: `http://localhost:3000`
* For production: `https://yourdomain.com`
4. Click **Save**
## 2. Configure Domain Allowlist (Web Applications)
If you're building a web application, you need to configure allowed origins for security purposes.
### Add Allowed Origins
1. Navigate to the **Domains** tab when on the project dashboard.
2. Click **Add Origin**
3. Enter your domain(s):
* For local development: `http://localhost:3000`
* For production: `https://yourdomain.com`
4. Click **Save**
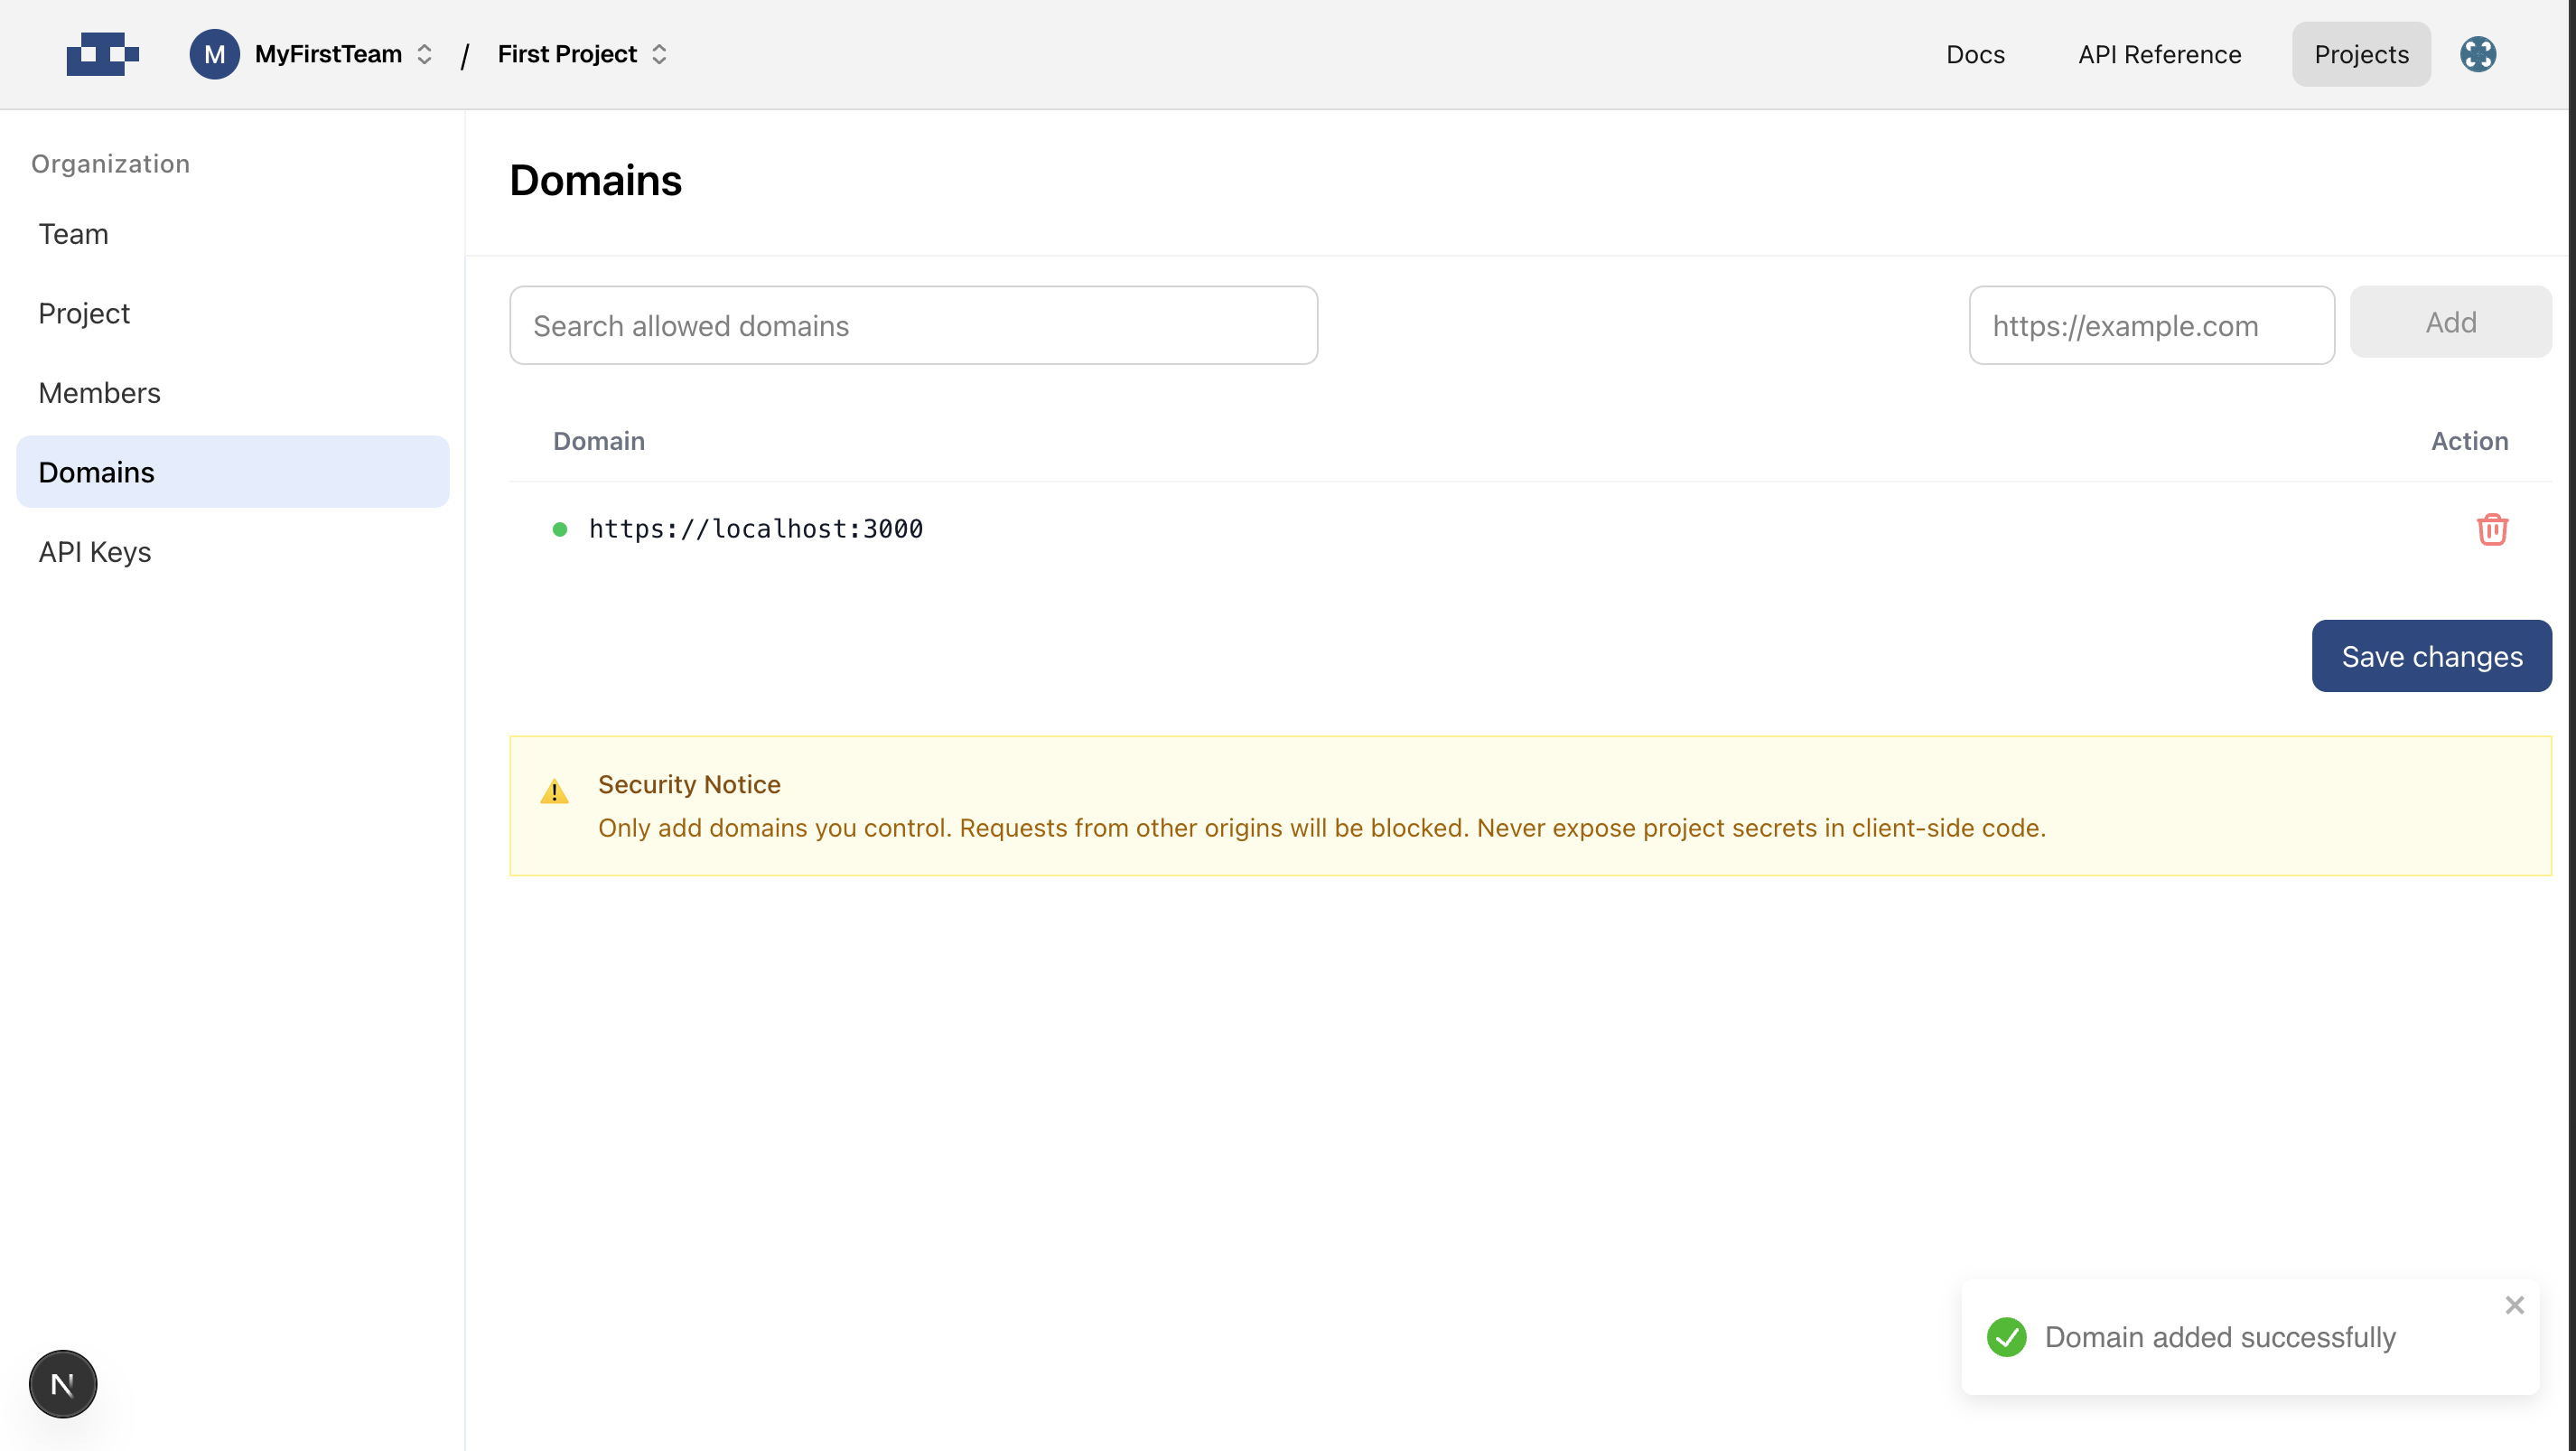 > **Important:** Requests from domains not in your allowlist will be rejected. Make sure to add all environments where your app will run.
## 3. Next Steps
Now that your SDK is set up, you can:
Start adding Offline Protocol React components to your app.
Browse our showcase of exceptional examaples.
## Troubleshooting
### Common Issues
**Project ID not recognized**
* Double-check that you're using the correct Project ID from your dashboard
* Ensure the project is active and not archived
**Domain not allowed error**
* Verify your domain is added to the allowlist
* Check for typos in the domain URL (including http/https)
* Wait a few minutes after adding a domain for changes to propagate
**SDK initialization fails**
* Ensure you've installed the latest version of the SDK
* Check your network connection
* Verify your project has the necessary permissions enabled
> **Important:** Requests from domains not in your allowlist will be rejected. Make sure to add all environments where your app will run.
## 3. Next Steps
Now that your SDK is set up, you can:
Start adding Offline Protocol React components to your app.
Browse our showcase of exceptional examaples.
## Troubleshooting
### Common Issues
**Project ID not recognized**
* Double-check that you're using the correct Project ID from your dashboard
* Ensure the project is active and not archived
**Domain not allowed error**
* Verify your domain is added to the allowlist
* Check for typos in the domain URL (including http/https)
* Wait a few minutes after adding a domain for changes to propagate
**SDK initialization fails**
* Ensure you've installed the latest version of the SDK
* Check your network connection
* Verify your project has the necessary permissions enabled